Showing posts with label Recipes. Show all posts

Saturday, March 23, 2013

Taco Salad


I've been trying the Blood Sugar Solution diet in an attempt to kick my bad sugar habit. This diet bears a nice one-two punch by requiring you to give up wheat and dairy, too. It's been a challenge, but I've also made up some nice recipes out of necessity. This is one of them and we've had it twice this week!

Taco Salad

Ingredients:

1 pound ground beef
1 medium onion, diced
1 jalapeño, minced
1 orange pepper, diced
1 tomato, seeded and diced
1 mango, diced
1 avocado, diced
1 head of romaine lettuce, chopped
Cumin
Onion powder
Garlic powder
Ancho Chili powder
Mexican oregano
Cayenne pepper
Cilantro

Instructions:

1. Brown 1 lb. of ground meat and season with one teaspoon cumin, 1/2 tsp onion powder, 1/2 tsp garlic powder, 1/4 tsp ancho chili pepper and 1/2 tsp salt. (You can add some cayenne if you like a kick.) As meat is nearing done, toss in 1/2 a diced onion, and 1/2 of jalapeño pepper and cook for five minutes or until onions are translucent. Set meat mixture aside.

2. In a bowl, combine 1 diced tomato, the other halves of your diced onion and jalapeño, 1/2 diced mango, 1 diced orange pepper, 1 diced avocado, a handful of chopped cilantro. Season with a bit of salt (it helps everything juice) and toss.

3. Chopped a head of romaine lettuce and drizzle with olive oil, Mexican oregano and a dash of cayenne. Add a heaping spoonful of the ground meat mixture. And toss. Top with salsa/veggie mixture and serve.

For the picture above, I skipped the avocado and used some of my salsa mixture to make roasted avocado.

Saturday, March 16, 2013

Cajun Fried Rice (or Quick Jambalaya)


This recipe is for Greta!

I've tried to make Jambalaya from scratch before but it always comes off wrong-- either it takes Forever! Or it just tastes unbalanced.

I had planned another go when my daughter got sick and really didn't want Mommy to be in the kitchen cooking. Of necessity came this quick version.

Cajun Fried Rice

1. In a rice cooker prepare a batch of brown rice. (I used 1 cup of rice with 2 cups of water.)
2. Broil 4 andouille sausages, and then slice.

When those two things are done...
3. Dice one large onion and one green pepper, sauté in olive oil for about five minutes. Add a minced garlic glove (I use a micro grater to mince mine right over the pan).

4. Add sliced sausage and toss together on high.

5. Add 1 cup of water and 1 tbsp tomato paste. Season with Tony Cachere's seasoning.

6. Add rice, stirring to blend until water has evaporated.

And serve!

Sunday, February 3, 2013

Getting Dressed for Dinner


Super Bowl in New Orleans means only one thing: Roast Beef PoBoys and Kale Artichoke dip.

Crockpot Roast Beef PoBoys

I was inspired for this recipe by a recipe here, but decided I could simplify this a bit. And anything is better crockpotted.

3 lb Chuck Roast
1 can Cream of Mushroom Soup
1 can Beef Broth
Tony Chachere's Seasoning (to taste. I used about 5 tablespoons)

Throw all of that in a crockpot on low for 8 hours and try not to spend the whole day lifting the lid to get a whiff.

Serve over french bread. In our house, we dress PoBoys on the simple side: Rob tops his with only mayo and more Tony's. I used Boirsin Cheese. Lots of people dress PoBoys with lettuce, onions, and tomatoes.

Kale Artichoke Dip

1 can of quartered artichoke hearts, finely chopped and about a quarter of the marinade
1 1/2 cups finely chopped kale
1/2 c mayonnaise
1/2 c cream cheese (use full fat-- that other stuff doesn't melt!)
1 cup mozzarella

Mix together, cover with a handful of mozzarella and parmaggiano. Bake at 375 degrees for 25 minutes or until cheese is bubbly. Serve with tortilla chips.


Wednesday, October 24, 2012

Tink Day! and Our Senses: Part 3

Some of you may not be up on your Pixie Hollow lore, but yesterday was a big day. Tinkerbell and the Secret of the Wings came out on dvd.


Yup, we had a copy on reserve for us at Barnes and Noble. I came very close to blowing it all when I forgot my wallet. But I was able to scrounch up enough change to cover our bill.


When we got home we put on our Tinkerbell green.


Maddie got a little more into the festivities, wearing last year's costume (made with love by Grandma).

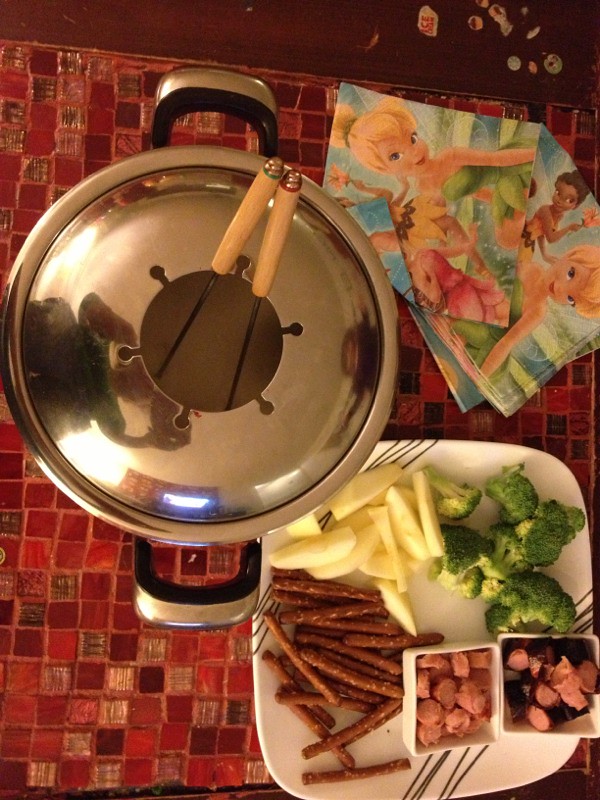
And then we settled in for our movie night, with a feast worthy of the Winter Woods (that's the setting of this movie, Tinkerbell-novices).


Fondue! This is a really mild version, found in Rachael Ray magazine from October 2008 (yup, found that laying around my house and it proved pretty useful!) I know i said mild fondue and the recipe actually says spicy, but i just skipped the chipotles -- thus mild. For the preschool edition of fondue, I made everything on the stove then transferred to my fondue pot but without a flame. We used hot dogs, broccoli, apples and pretzel sticks for dunking.


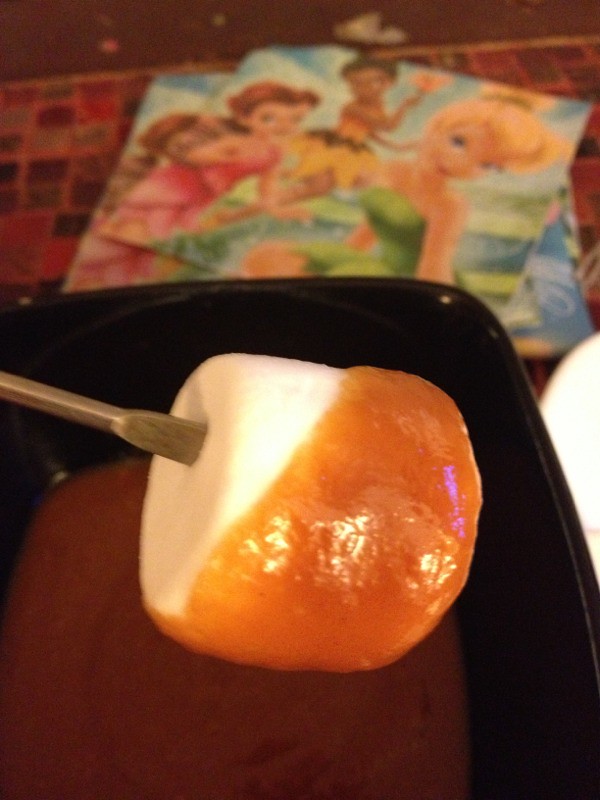
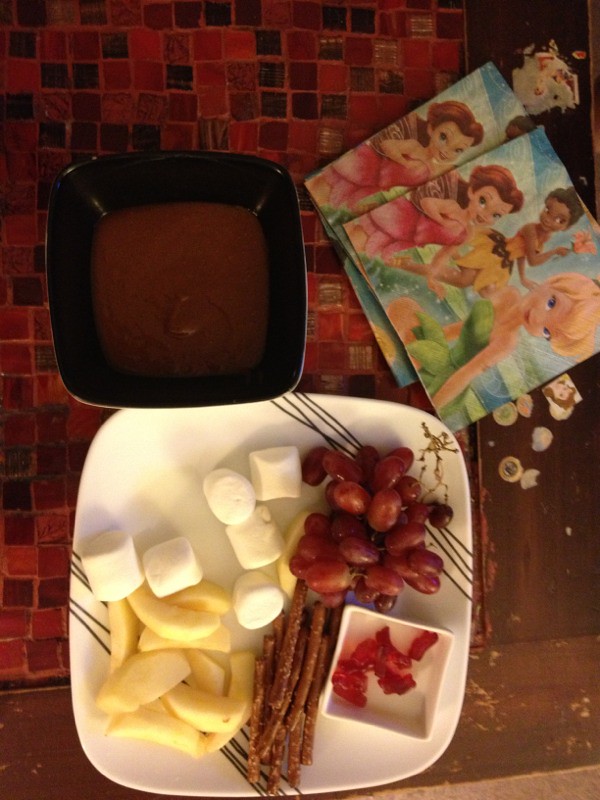
Then came this delectable dessert fondue, from the same Rachael Ray magazine: Butterscotch Fondue.


This time we used more pretzel sticks and apples, plus marshmallows, grapes and Annie's organic bunnies.

After the movie we played a little game to learn about our hearing: Tinkerbell Hide and Seek.


I tied some jingle bells around Tink's hair -- very appropriate since Tinkerbell jingles when she talks. Then we took turns hiding with Tinkerbell and making her jingle. Maddie learned she could follow the sound to find Tinkerbell.


She got pretty into it. Maddie and Tink hide behind a shelf and a closet in the pictures above. Now maybe when we play hide and seek, Maddie will remember this and be quiet when hiding. Probably not.


Monday, October 15, 2012

Pumpkiny Goodness


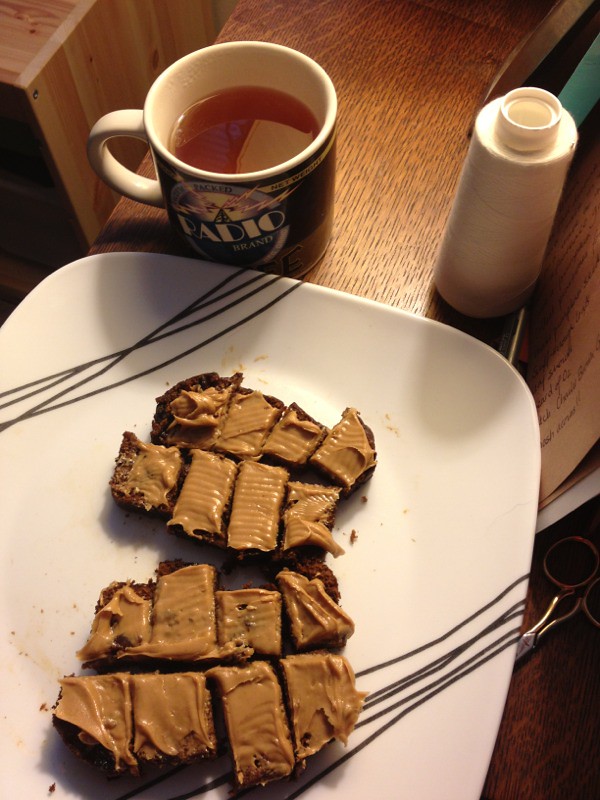
(Yummy.... Pumpkin Raisin Bread with peanut butter and hot tea!)
Ah yes, fall. And to me, fall means only two things. Pumpkin baked goods and doughnuts. So far, I've pinned 5,000 recipes for pumpkin bread/muffins/cookie bars and 5,000 recipes for doughnuts. And another 5,000 recipes for pumpkin doughnuts.
And hey, pumpkin's a vegetable so anything you bake with it is instantly healthy. Right?
I'm sharing my recipe for pumpkin bread for you here. It's amazingly good and easy too. I usually make one loaf for insta-eating and two dozen muffins that I freeze (so I can grab one on my way to work).
Alex's Pumpkin Raisin Bread:
Preheat the oven to 350 degrees. Grease your bread (or muffin) pans. Mix all dry ingredients first and then add wet ingredients:
3 cups white sugar
2 teaspoons cinnamon
3 cups flour
2 teaspoons baking soda
4 eggs
28 ounces (2 small cans) of solid pack pumpkin
3/4 cup applesauce
2 cups raisins (stir in at end)
Fill loaf pans 2/3 of the way full and muffin tins 3/4 full. Bread should bake for 1 hour and muffins about 30-35 minutes.
I love this bread with a little bit of peanut butter or cream cheese.
***Note to self, do not ask husband to turn off oven when timer goes off when he is in the middle of waiting for Drew Brees to break a record.
***Note to readers, this bread even tastes pretty good when it's overcooked! Still moist!
***Note to Natalie, sorry I said "moist", but it fit.

Tuesday, July 31, 2012

Roasted Purple Potatoes


Ok, here goes the last salt heavy recipe that you will receive from me. And please note in the picture above you can see my little salt jar peeking into the photo as if to say, "No, please! Don't leave me behind!" Ah, salt...

But alas, I've decided to try giving up salt and coffee for a bit.  I actually grew up without either of these two lovely, beautiful things. My mom never drank coffee. I picked that one up senior year of college in an attempt to study in coffeehouses and get better grades (or a husband, checkity check.) She also never used salt on anything except eggs. I really didn't use salt until I was living on my own and cooking up a storm.

I've decided that salt and coffee probably aren't doing me any good at the moment. In fact, I'm pretty sure the only part of my body that is better for them is my tastebuds. So I'm detoxing and giving them up... for now.

In the meantime, I made this lovely version of hash browns tonight -- secretly in an attempt to make Maddie like potatoes. She did not.

Roasted Purple Potatoes with a Frittata "Sandwich" and
Blistered Tomatoes
Roasted Purple Potatoes:

1. Chop up a blend of fingerling potatoes which include purple ones (obviously!)  and soak them in water for about 15 minutes. I like to dice my potatoes rather small so that I don't spend a ton of time cooking them.

2. Drain thoroughly! Remember that part about how I was cooking up a storm? Well, I know stuff and then I do stupid things anyway. Like drip a bit of water in a pan of oil. Did you know that can actually start a fire? Things that went through my head tonight: We should really by a fire extinguisher. Hmmm, maybe storing cereal boxes on top of the fridge is not a good idea. Huh, so this is what Grandpa Mac felt like. Oh, look it self-extinguished. Phew.

3. Put two tablespoons of olive oil in a frying pan and heat on medium. While heating, dice half of a purple onion.

4. Gradually add your DRAINED and maybe even patted dry potatoes to the frying pan. Douse them with a whole lot of salt -- I used a big pinch (it's my last salty meal!) and cover them, stirring occasionally until you can puncture them with a fork. My small diced potatoes took about 10 minutes.

5. Add purple onion and fry without the lid for about 5 more minutes, turning frequently, until potatoes are crispy and onion is cooked through. Top with fresh herbs -- I used scallion greens -- and serve.

***If you've given up salt or coffee and have words of wisdom or encouragement, I'd love to hear them.


- Posted using BlogPress from my iPhone

Sunday, July 8, 2012

Greek Caesar

As with all my recipes, this Greek Caesar Salad was born from a meal that went wrong. I started to make a Caesar salad and realized I was out of lots of stuff. I found myself dumping in herbs that were more Greek than Caesar and Voila! Or should I say Opa!


Greek Caesar Salad:

1. Chop up two chicken breasts into nice thin, bite-sized strips. Toss them in a mixture of 2 Tbsps dill (I used dry, but if you've got fresh, go for it!), 3 minced cloves of garlic, 1 tsp of oregano, and salt and pepper. Fry them in some olive oil until cooked through. Add one sliced onion in the last minute of cooking.

2. Mix salad dressing in a big bowl: 3 Tbsps plain Greek yogurt, a splash of milk (start small and add a bit more if your dressing looks thick. Be conservative and if your dressing gets too runny just add a bit more yogurt.) Add 2 Tbsps dill, 1 tsp oregano, 2 cloves minced garlic, salt and pepper to taste.

3. Toss 1 head of romaine lettuce, torn or cut, with salad dressing. Top with chicken and onions, and a bit of parmasan cheese. This is great with a side of pita (and a dessert of mints!)

Sunday, May 27, 2012

Antipasto pasta salad

Ok, antipasto pasta salad has always been a little pet peeve for me. You don't eat pasta salad before the pasta course, folks. But it also sucks me in every time I see it. Because it's really just that delicious.


So here's a sneak peek of my Memorial Day offering.

Antipasto Pasta Salad:

The secret to a good salad, I'm sorry to say, is salt. I learned this trick the first time I went to Italy and we ate in an off-the-beaten path restaurant where a real Italian Mama prepared her table's salad by salting it. Hello, love! Later in life, I was fortunate enough to take some cooking lessons in the south of France where I met my other salad secret, a whisk and some elbow grease. A good salad dressing has to be emulsified and you need both of these secret weapons to do it.

The Dressing:

Start with 2Tbsps of red wine vinegar (I use Chianti vinegar) in your salad bowl. Add a dash of salt (I'm trying to cut back so I go with about a teaspoon, you just need a little bit to make the oil stay blended) and some fresh ground pepper. Add 2 minced black olives and 2 minced cloves of garlic. Get that whisk in one hand and your bottle of olive oil in the other. Start whisking while drizzling in about 3Tbsps of olive oil. Beat the hell out of it. (This is what I learned in cooking school --that and use as many dishes as possible). Let it sit while you prep the rest of the salad. If you've beaten the hell out of it, it should stay nicely blended. If not, add more elbow grease.

The salad:

Boil water and make a box of fusili pasta according to the box's directions. Drain and let sit to cool.

Prep your fixings: one can of artichoke hearts (quartered), one red pepper (sliced in thin strips), red onion (thinly sliced, I use about a quarter of an onion), one can of black olives, pepperoni (sliced into thin strips), fresh mozzarella (cubed), and arugula. You could also use some banana peppers if you like.

Once your pasta has cooled, add it to your salad bowl of dressing and mix. If you are prepping this salad in advance (and you can! Letting that pasta seep in the dressing is going to make it more awesome) wait to add your toppings until right before you serve it.

There you go. Yummy and meal worthy.

- Posted using BlogPress from my iPhone

Tuesday, May 15, 2012

BBQ Pork - 3 Easy Meals

This is super simple. Seriously. Ready for recipe?

Put two pork tenderloins in your slow cooker with one bottle of your favorite BBQ sauce (I use Wegmans Memphis BBQ -- delish!) Cook on low for 8 hours. Yup, that's it. And from that bounteous gluttony you can make the following:

  • Shredded Pork Sandwiches: Shred up a third of the pork (easy since it was slow cooked) and pile high on a nice kaiser roll, top with some extra sauce. Serve with cole slaw (on top of the sandwich or on the side). I like to buy broccoli slaw which I toss with olive oil, lemon juice and salt and pepper. Or sometimes I serve with shredded carrots tossed with mayo, lemon juice and raisins.

  • BBQ Pork with Garlic Mashed Potatoes:


    Boil some potatoes and mash with minced garlic and sour cream. Top with a few large pieces of your pork. Drizzle with extra sauce and top with some shredded cheddar. (hmmm... There should be a veggie here. Baby carrots work!)

  • BBQ Pork Tacos: offer all your favorite fixings but I prefer shredded cheddar with guacamole and diced tomatoes on flour tortillas. Yum!

    See, super easy. And barely no cooking whatsoever.

    - Posted using BlogPress from my iPhone
  • Saturday, February 25, 2012

    Making Playdough

    This week has been a little on the long side. While I've been home for Winter Break (God love the Buffalo school systems. I mean two spring breaks? Genius!), we've been doing some of this:


    Yup, potty training. Which means we've been staying indoors close to the potty all week.

    My awesome Mother came over yesterday to give me a break and my husband has been doing his best to help during a rather busy week. But still there are only so many hours in the day that a girl can color. Right?

    Then it dawned on me last night that I was just not planning enough or being creative enough. Sometimes I'm so ready for a vacation that I forget to actually plan out things to do and then I get stuck in a rut. Ugh.

    So this morning we made playdough. I had seen this idea around the internets and Maddie loves to watch the video on YouTube. But I was a little leery of trying it as I sensed disaster looming -- disaster for my pans, disastrous lumps of unusable gunk, disastrous mess...

    Then I found this site: http://www.instructables.com/id/How-to-Make-Playdough-Play-doh/step2/Mix-and-heat/?f=m

    Super easy directions and, my favorite, step by step pictures. Voila!


    Maddie stirs the ingredients. (I'm not a bad mom - that stove isn't on. But she is wearing "Santa's Little Helper jammies with Mardi Gras beads).


    Surprisingly un-messy. Though I am still soaking that pot.


    Maddie takes a break to drink hot cocoa with "horsemellows" (ironic, huh?) while watching the snow fall. I know, snow in Buffalo! It's shocking.


    How much fun is this, Maddie?


    Then you mush in the color. I mean YOU the adult because this is what happens:


    Reasons to do craft projects at the beginning of a vacation. Hmmm, maybe I can paint my nails black and pass it off...

    Then Maddie says,


    You take the spoons and you flip it. It took me 10 minutes to work in the color into four different doughs.


    It took her one minute to smush it into one ball. Well, at least we took a break from coloring.

    -Posted using BlogPress from my iPhone

    Wednesday, January 18, 2012

    Healthy Lunch Salad

    I'm kind of known in my office for having really unusual, healthy lunches. I've always been really picky about lunches but one thing I love is a whole grain salad. I try to do really simple things that don't take a lot of prep work and that can last most of the week, so that I am only making lunch once.

    This salad is super simple to make and gets great reviews amongst my co-workers:


    Quinoa Grape Salad

    This is just red quinoa, a bunch of grapes, crumbled feta cheese and walnuts, tossed with a bit of lemon juice. A note about quinoa -- quinoa is awesome though I know it can be a bit intimidating to newbies. The secret is that you have to salt the water as you boil it. This salad I made with a package of red quinoa that my local grocery, Wegmans, sells. I doubt that most places have this, but regular quinoa works the exact same. I cook it according to the package and after it's cooked, toss in a bit of lemon juice. Then I let it cook to room temperature and add in the feta, grapes and walnuts. Second secret, I use Emerald Dry Roast Walnuts which are coated in some sort of liquid crack. They're seriously awesome.

    The one package of red quinoa makes enough for about three to four lunches for me. Super easy and super delicious. Enjoy!

    Tuesday, December 6, 2011

    Pomegranate pancakes


    **warning, these photos do no justice!

    This morning I tried to make Ashley's (from Under the Sycamore) Buttermilk Pancakes. At the same time, I decided to show Maddie something new: a pomegranate.

    Maddie often asks us what we need so she can write a shopping list. I like to give her fun food words to write and pomegranate is a popular one. Lo and behold they were on sale the other day, so I grab one. I cut it open to show Maddie and she had the brilliant idea of adding it to our pancake batter. Healthy and delicious!


    How's this for added nutritional value, we not only had pomegranate in our pancakes, but I was out of eggs, so I added applesauce (and just bumped up the baking soda and powder).


    - Posted using BlogPress from my iPhone

    Saturday, November 12, 2011

    Delish.... Ous.


    I had one last Halloween urge left in my system and that was to make these chocolate doughnuts. So I made them last night with a very special helper. I unfortunately never got any pictures of the doughtnut maker as we were both quite the mess, but I do have two perfectly preserved flour handprints on my bedroom door to memorialize the occasion.

    Here's what I have to share Martha Stewart is a genius and these treats were one of her best ideas. She probable did not make them on an electric oven though --not great for frying. Consequently my doughnuts are a bit on the crispy (read: burned) side. But they taste good.

    Here's the recipe for Chocolate-Caramel Doughnuts Holes.


    - Posted using BlogPress from my iPhone

    Wednesday, October 26, 2011

    A Taste of Fall

    For me, October is less about Halloween and more about Fall food. I've been pretty busy cooking some of the recipes I've found on Pinterest lately. But the other day I decided to try something new.

    Buffalo is pretty big on sweet potato fries... And that got me thinking: what if I made Butternut Squash Fries?


    (Somehow these photos always look so much more appealing on my iPhone. I really need to get a new camera!)

    So I made French Dip (recipe found here through Pinterest) with a side of Butternut Squash Fries.

    I'm not a big fry person and I've never made them from scratch before. I experimented a little and I'm sure a better cook would know the best way to actually fry these-- I ended up baking them.

    To try it for yourself just seed and cut up one butternut squash. I chose to cut them into very thin matchsticks. Toss them in olive oil (about 1-2 tablespoons, you want them pretty oily or they'll stick) and spread thinly on a baking sheet. Bake at 400 degrees, turning occasionally until browned (about 20 minutes). Sprinkle with kosher salt immediately after you take them out of the oven. Delicious!


    Posted using BlogPress from my iPhone

    Wednesday, October 19, 2011

    Pear Gruyere Pie


    Ah, doesn't that just sound so rhymey and delectable? Well, it is. So there.

    Fall is upon us, it seems, and that meant a recent trip to a farm stand near Kopeka. I had intentions of making an apple pie, but the I also bought a ton of pears... And I started thinking of Pushing Daisies.

    [Side note, that was seriously an awesome show! While I'm mainly a plot-hooked person, that show was visually stunning-- more so in the first season. Seriously, Netflix that baby and note that each scene has a two-three color scheme AND a geometric/pattern theme that permeates everything from costumes to scenery. Fascinating.]

    Anyway, Chuck used to make a Pear Gruyere pie. I'm not usually a pie making person but I decided to experiment a la the old "Pie Hole." And I came up with this recipe.

    Now I should mention, this started off seeming to not be a day for pie making. First I realized I was almost out of flour. Which meany my pie crust was a little moist, and had to be hand pressed. Someone kept eating all my pears (seriously she ate them faster than I could peel them!) I was out of nutmeg. And my pie dripped onto the bottom of my oven (yuck, but those drippings joined many others so at least they aren't lonely). But voila!

    Pear Gruyere Pie

    Crust:
    2cups flour (I blended whole wheat and regular bleached flour, as I was out!)
    8 Tbsp butter, cold and chopped
    4-5 Tbsp cold water
    Pinch of salt
    3-4 oz of shredded Gruyere

    (Mix by hand, adding a little more water if needed.chill dough for about 30 minutes, then divide and roll into two crusts.)


    Filling:
    Peel and dice pears (I used Bartlett)
    Toss with A splash of lemon juice

    In a separate bowl, combine a few handfuls of granulated sugar, pumpkin pie spice (or just nutmeg if you have it!) and 2 Tbsps butter. Sprinkle in with your pears and toss to coat.

    Assemble the pie (I use a glass pie pan and just spray it with cooking spray to be safe.) Cut the top of the crust to vent, and sprinkle all over with about 3 oz of grated Gruyere.

    Bake at 375 degrees (with a baking sheet underneath...) for about an hour or until bubbly delicious.

    Enjoy and as you do chew away the bitterness of ABC's cancellation of Pushing Daisies.

    - Posted using BlogPress from my iPhone

    Tuesday, August 2, 2011

    Sloppy Maddies

    One of my go-to dinners has always been Sloppy Joes, which we now call Sloppy Maddies. See?


    (ok, so this picture is more about potential and how my model will do things at her own pace and how dare you take my picture during dinner Mommy).

    It's super easy and just plain old delicious. And here, I give you the recipe.

    Sloppy Maddies:

    1 lb ground turkey
    1 clove garlic, minced
    1 Tbsp cumin
    1 tsp paprika
    salt and pepper
    1 medium onion, chopped
    1 large red pepper, chopped
    1 can tomato paste
    1 can (28 oz) whole tomatoes
    2 Tbsp brown sugar
    1 Tbsp Worchestershire sauce

    1. Brown ground turkey in a tbsp of olive oil. Add cumin and paprika.
    2. Add onion and red pepper, cook about 5 minutes on Med High. Add garlic cook 1-2 minutes.
    3. Add tomato paste and stir.
    4. Add tomatoes, breaking them up by hand before adding, and all juice. Add brown sugar, worchestershire, salt and pepper.
    5. Stir and simmer for about 10 minutes.


    Serve over rolls or bread. This really made a ton of food, we ate it for two different dinners!

    Enjoy, but remember whoever makes this has to clean up Maddie.

    Thursday, July 14, 2011

    As American as ...

    Cherry Pie!


    I never ever make pie. Truth be told, I am not a big pie person except maybe on Thanksgiving day when I will eat a slice so that I can enjoy the Cool Whip. (Yes, I said Cool Whip, Tom!)

    But a little while ago my Mom gave me a pint of cherries and they just weren't being eaten. So I contemplated making a regular old pie. And then I thought, "Naw, I can do better than that."

    So I made a sugar cookie:

    1/2 cup butter
    1/4 cup sugar
    1 1/2 cups flour
    1 egg
    Bake in an ungreased pie tin at 450 degrees for 10 minutes

    Then I added it with cherries (just cleaned and pitted, nothing fancy).

    Then I topped it with a diabetic coma:

    [Sorry this is really just guess work here]
    2 Tbsps cold butter
    a handful of sugar
    a handful of brown sugar
    a small handful of flour
    blend or mix by hand until you've got a nice sugary crumble and throw it on top of the pie
    Throw the whole thing in the oven for about 10 minutes more.

    And you know what? It was really good.